How to Convert Any Image to Embroidery File (Step-by-Step Guide)
Learn how to easily convert any image into an embroidery file with this comprehensive step-by-step guide. Perfect for beginners and experienced embroiderers alike!
Introduction
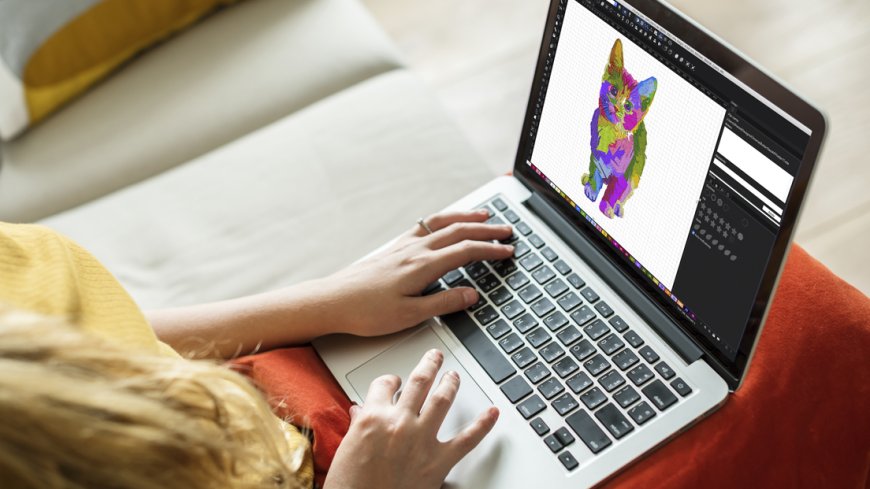
Have you ever seen a beautiful image and thought, "This would look amazing embroidered"? Converting regular images into embroidery files isn't as complicated as you might think. With the right tools and techniques, you can convert image to embroidery file formats, transforming any picture, logo, or design into stitchable embroidery art.
In this guide, we'll walk through the entire process from start to finish. You'll learn how to choose the right images, prepare them for digitizing, and convert image to embroidery file formats while troubleshooting common issues along the way. Whether you're looking to create custom patches, personalized gifts, or unique designs for your clothing, this guide will show you exactly how to convert image to embroidery file successfully.
Understanding Embroidery Files
Before we dive into the conversion process, it's important to understand what makes an embroidery file different from a regular image file.
What is an Embroidery File?
An embroidery file is a specialized digital format that contains instructions for embroidery machines. Unlike regular image files that store color and pixel information, embroidery files contain:
-
Stitch types and patterns
-
Thread color sequences
-
Stitch directions and densities
-
Machine movement coordinates
Common Embroidery File Formats
The most widely used embroidery file formats include:
-
DST (Tajima)
-
PES (Brother)
-
EXP (Melco)
-
JEF (Janome)
-
VP3 (Husqvarna Viking)
Each embroidery machine brand typically has its own preferred format, so you'll need to know which format works with your specific machine.
Step 1: Choosing the Right Image
Not all images convert well to embroidery. The best candidates for conversion share these characteristics:
Ideal Image Qualities
-
High contrastbetween elements
-
Clear, defined edges
-
Simple color schemes(fewer colors work better)
-
Minimal small details(tiny text or intricate patterns may not stitch well)
Image Types That Work Best
-
Logos with bold outlines
-
Simple illustrations
-
Silhouettes
-
High-contrast photographs (for portrait-style embroidery)
-
Clip art with clean lines
Images to Avoid
-
Watercolor-style artwork
-
Photos with lots of gradients
-
Extremely detailed images
-
Low-resolution or blurry pictures
Step 2: Preparing Your Image
Proper preparation is key to successful conversion. Follow these steps to optimize your image:
Clean Up the Image
-
Remove any unnecessary background elements
-
Increase contrast to make edges more defined
-
Simplify complex areas that might not stitch well
Recommended Tools for Image Prep
-
Adobe Photoshop (professional option)
-
GIMP (free alternative)
-
Canva (for basic edits)
-
Inkscape (for vector conversions)
File Format Considerations
While you can work with JPG or PNG files, vector files (like SVG or AI) typically convert better because they:
-
Scale without losing quality
-
Have cleaner edges
-
Are easier to edit and separate by color
Step 3: Digitizing Your Image
This is where the magic happens - converting your prepared image into stitches.
Choosing Digitizing Software
Options range from professional to beginner-friendly:
Professional Software:
-
Wilcom EmbroideryStudio
-
Pulse Embroidery
Mid-Range Options:
-
Hatch Embroidery
-
Embrilliance
Free/Budget Options:
-
Ink/Stitch (Inkscape plugin)
-
SewArt (basic auto-digitizing)
The Digitizing Process
-
Import your prepared image into the software
-
Set your design size and hoop dimensions
-
Trace or auto-digitize the main elements
-
Assign stitch types to different areas:
-
Fill stitches for large areas
-
Satin stitches for borders and text
-
Running stitches for fine details
-
-
Set stitch directions and densities
-
Add underlay stitches for stability
-
Sequence the color changes
Pro Tip:
Always work from background to foreground when assigning stitch order. This prevents later stitches from being covered by earlier ones.
Step 4: Testing and Refining
Before committing to your final product, it's crucial to test your design.
How to Properly Test:
-
Stitch out on similar fabric to your final project
-
Use the same thread and stabilizer you plan to use
-
Watch for any issues during stitching
Common Problems and Solutions:
-
Puckering fabric?Reduce stitch density or use better stabilizer
-
Thread breaks?Check tension settings or reduce speed
-
Details missing?Increase stitch density or adjust design size
-
Colors blending?Add more underlay or change stitch direction
Step 5: Saving and Exporting
Once your design stitches perfectly, it's time to save it properly.
Choosing the Right Format:
Save in both:
-
Your machine's native format (e.g., PES for Brother)
-
The software's project file format (for future edits)
Naming and Organization:
-
Use descriptive filenames
-
Include size information if making multiple versions
-
Store in organized folders by project type/date
Advanced Tips for Better Conversions
Take your embroidery files to the next level with these professional techniques:
Manual Editing Tricks:
-
Add manual stitch points in curves for smoother lines
-
Vary stitch lengths in fill areas for more natural look
-
Use specialty stitches for unique textures
Color Optimization:
-
Limit your color palette for cleaner results
-
Group similar colors in the stitching sequence
-
Consider thread color availability
Design Adjustments:
-
Add slight pull compensation for stretchy fabrics
-
Modify designs based on fabric type
-
Create different versions for different garment areas
Alternative Conversion Methods
If you don't have digitizing software, consider these options:
Online Conversion Services:
-
Affordable for one-off projects
-
Good for simple designs
-
Turnaround times vary
Professional Digitizers:
-
Best for complex designs
-
Guaranteed quality
-
Higher cost but saves time
Auto-Digitizing Apps:
-
Quick and easy
-
Quality varies greatly
-
Best for very simple designs
Troubleshooting Common Issues
Even with careful preparation, you might encounter these problems:
Design Not Stitching Correctly
-
Check machine compatibility
-
Verify file format
-
Ensure design isn't too large for hoop
Poor Image Conversion
-
Start with higher quality image
-
Simplify complex elements
-
Try manual digitizing instead of auto
Thread or Fabric Problems
-
Test different stabilizers
-
Adjust machine tension
-
Try different thread types
Maintaining Your Embroidery Files
Proper file management saves time and frustration:
Organization Tips:
-
Create a logical folder structure
-
Keep original images with embroidery files
-
Document thread colors used
Version Control:
-
Save iterations of designs
-
Note changes made between versions
-
Archive unused versions
Conclusion
Converting images to embroidery files opens up endless creative possibilities. While the process requires some practice and patience, the ability to turn any design into stitched art is incredibly rewarding.
Remember:
-
Start with simple designs as you learn
-
Don't be afraid to make test stitches
-
Keep refining your technique
-
Consider professional help for complex projects
With these skills, you're ready to bring any image to life in thread! What will you create first?


