


Led Strip Connector
The functionality, types, and installation process of LED strip connectors. Learn how to choose the right connector for your lighting project and ensure secure connections
LED strip lights have become a popular choice for both residential and commercial lighting applications. Their versatility, ease of installation, and energy efficiency make them a top contender for a wide range of lighting needs. However, the ability to connect LED strips correctly and securely is crucial to achieving optimal performance. This is where LED strip connectors come into play. These small yet essential components allow users to connect LED strips, ensuring a stable, safe, and lasting electrical connection.
In this article, well dive into the world of Led Strip Connectors what they are, the different types available, how to choose the right one for your project, and the steps involved in proper installation.
What is an LED Strip Connector?
An LED strip connector is a device used to link LED strips together or connect them to a power source, dimmer, or controller. These connectors help maintain the flow of electricity between the LED strips, ensuring consistent brightness and functionality. Whether you're creating a custom lighting setup or extending an existing one, LED strip connectors are essential for achieving secure, reliable connections without the need for soldering.
Types of LED Strip Connectors
There are several different types of LED strip connectors, each designed for specific needs and applications. Heres a look at the most common ones:
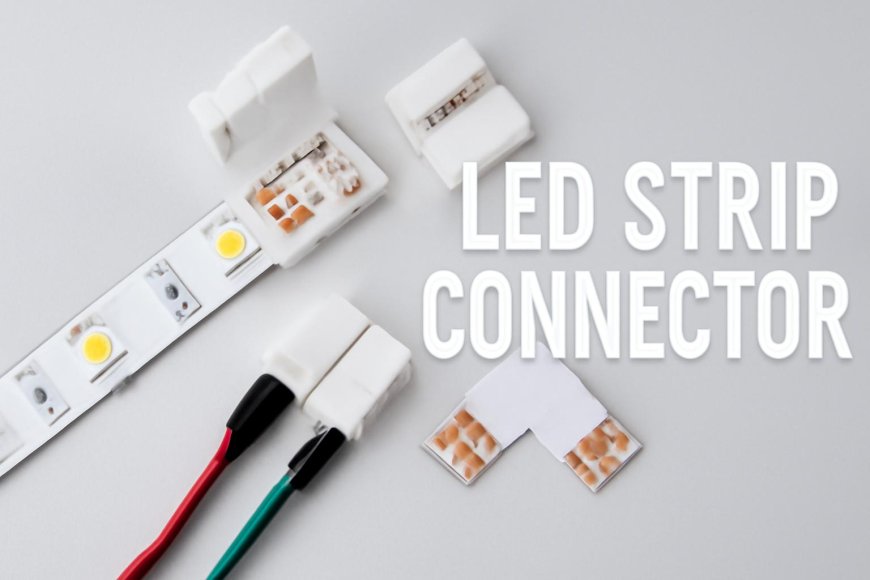
1. Clip-on Connectors
Clip-on connectors are designed for quick, tool-free installation. They work by clipping onto the copper pads of the LED strips, creating a secure connection without the need for soldering. These connectors are ideal for DIY projects and smaller installations, as they are easy to use and provide a reliable connection.
2. Solderless Connectors
Solderless connectors are designed to offer a more permanent solution without the need for soldering. They are similar to clip-on connectors, but instead of clips, they feature small connectors that hold the strip in place. These connectors are ideal for connecting different lengths of LED strips or creating custom setups. They offer a clean, professional finish while avoiding the need for any soldering.
3. JST Connectors
JST connectors are commonly used in applications where a high degree of precision and stability is needed. These connectors have a small, compact design and are perfect for tight spaces. They are often used in professional-grade LED installations and are compatible with various types of LED strips.
4. Quick Connectors
Quick connectors are ideal for users who need a fast, easy way to connect their LED strips. They are typically used in commercial applications where speed and efficiency are important. Quick connectors usually have a simple push-to-connect feature, making them easy to install and replace if necessary.
5. Wires and Pigtail Connectors
In some cases, LED strip connectors will come in the form of wires or pigtails that allow for easy connection between strips or between a strip and a power supply. These connectors provide a flexible solution, particularly in situations where the strips need to be connected to a power source that is located a short distance away.
6. T-shaped and L-shaped Connectors
T-shaped and L-shaped connectors are used to make more complex shapes with LED strips, such as corners, turns, and intersections. These connectors allow you to maintain the correct orientation of the strips while navigating sharp angles or intricate layouts. They are often used in installations that require precise, sharp bends.
How to Choose the Right LED Strip Connector
Choosing the right LED strip connector can make or break your lighting installation. Here are some key factors to consider when selecting a connector:
1. Compatibility with LED Strip Type
Ensure that the connector is compatible with the type of LED strip you are using. LED strips come in various voltages (12V, 24V, etc.), and the connectors must be rated to handle the same voltage as your strips. Additionally, ensure that the connector is designed for the same width and density of the LED strip (e.g., 8mm, 10mm, etc.).
2. Installation Environment
Consider where the LED strips will be installed. If they are being used in a wet or outdoor environment, choose connectors that are rated for waterproof use. Many connectors come with a protective cover or are sealed to keep moisture out, preventing potential electrical damage.
3. Ease of Installation
Some connectors are designed for quick, DIY installation without the need for tools, while others may require more advanced knowledge or tools for use. Choose a connector based on your skill level and the complexity of the installation. Solderless connectors or clip-on connectors are ideal for beginners, while professional installers may prefer JST or quick connectors for their durability and precision.
4. Connector Type
Decide on the type of connection you need. For example, if you are making sharp turns or angles in your lighting design, T-shaped or L-shaped connectors are the best choice. If you need to connect different strips end-to-end, standard clip-on or solderless connectors are a good option.
How to Install LED Strip Connectors
Installing LED strip connectors is relatively simple, even for beginners. Follow these basic steps to ensure a smooth installation process:
1. Cut the LED Strip to the Desired Length
Before installing connectors, make sure that your LED strips are cut to the correct length. LED strips are usually marked with cut points that ensure you can cut them without damaging the wiring. Always cut along the designated lines.
2. Prepare the Connector
Depending on the type of connector, you may need to prepare it by either snapping it in place or inserting the LED strip into the connector. Ensure that the copper pads of the LED strip align properly with the connectors pins or clips.
3. Attach the Connector
Carefully attach the connector to the LED strip. If you are using a clip-on connector, simply snap it onto the copper pads of the strip. For solderless connectors, press the strip into the connector to ensure a secure fit.
4. Connect the LED Strip
If necessary, connect the other end of the LED strip to another strip or power supply. Ensure all connections are secure, and there is no exposed wiring.
5. Test the Setup
Before finalizing the installation, test the lights to make sure they function properly. If there are any issues, double-check the connections to ensure everything is properly attached.
Conclusion
LED strip connectors are essential components for any LED strip lighting installation. Whether youre looking to connect strips, create custom lighting designs, or extend an existing setup, selecting the right connectors ensures a stable, long-lasting connection. With the right tools and a bit of patience, anyone can achieve professional-quality lighting without the need for complex wiring or soldering.
By understanding the types of connectors available and following the proper installation steps, you can enhance your lighting projects performance and reliability.